Showing posts with label paper. Show all posts

Friday, May 17, 2013

A plant I can't kill


Check out my new house plant. It's healthy and thriving because I'm giving it the perfect amount of water and sunlight.


I made it from the cardboard kit, Port-a-Plant, sent over from Chronicle Books. It contains punch-out parts for three different paper succulents. The leaves can be a bit challenging to slip into their slots, so I think a child might have trouble with this. But a grown-up will conquer the cacti. Fun, right?


Tuesday, May 14, 2013

Framed origami animals


I amused myself the other day by making some little origami foxes using this diagram by Mark Leonard, and a whale using these traditional instructions. (The website where I found the fox is apparently no longer active or I'd link to it.)


I thought maybe these animals need a place to live, so I made them each a habitat.


You can download and print these backgrounds, then glue your own origami animals onto them if you like. Framed, they'd be cute in a kid's room.

Download the woods.
Download the sea.

Print out the sheets and leave them 8 1/2" x 11" or trim them a bit to 8" x 10", a more common frame size. The animals were made from 6" standard-size origami paper. A full square for the whale and a half sheet for each fox. You could also shrink everything to mini size and make some little cards if you have nimble fingers.

Tuesday, April 30, 2013

Build your own paper globe


I just came across Joachim Robert's Le Paper Globe, a free papercraft model you can build. Download and print the pieces in English or French, A4 or letter size. Click through the step-by-step assembly instructions on the website for how to construct this terrestrial ball.

The PDF is editable in Adobe Illustrator, so feel free to make any customizations you like. See globes made by others on Le Paper Globe's Facebook page. Globes shown here are by An-Magritt Moen, Georgia Polo, and A Merry Mishap.

Monday, April 29, 2013

DIY paper banners for Cinco de Mayo


Several blogs offer instructions for making simplified papel picado (perforated paper) banners. These would be fun to whip up for a Cinco de Mayo shindig or birthday party. Find directions here:
Papel picado streamers by Studio DIY
Papel picado in purple and pink at Green Wedding Shoes
A downloadable template for papel picado from Happy Thought
Arrow-inspired garland by Lovely Indeed

Also see instructions for mini papel picado-inspired cupcake flags and straws. Consider succulents planted in cans for table decorations or party favors, too— like this or this. Little cacti are usually quite cheap at Home Depot.

Tuesday, April 23, 2013

Make bookmarks with tape

Washi tape DIY
I'm still waiting for TV producers to create Hoarders: Washi Tape Edition, because I bet there are enough of us out there to make an entire series. Why in the world is it so satisfying to collect decorative tape?

Here's a way to put some of that stock pile to good use (unless you're one of those people who uses an electronic gadget to read books. Me, I prefer paper pages.)

I used some Jonathan Adler paper tape, plus a bit of orange washi tape, to make some easy patterned bookmarks.

DIY washi tape bookmark
I placed three strips of tape side by side on a sheet of cardstock and trimmed it into a rectangle. Then I printed up a little Groucho Marx humor and attached the quote with more tape.

To make your own, download the Groucho quote right here. Print the page, cut out the little rectangles, and attach them to patterned paper or taped-up cardstock.

DIY Jonathan Adler tape bookmarks

Thursday, April 18, 2013

How to make a paper bow


I've gotten some questions asking how I made the paper bow on the bottom package in this post. Here's a quick tutorial. I made a template so you can see the parts.

Download the PDF template right here.

If you print the PDF on colored paper and cut out the pieces, you'll have enough parts to make two bows. Or you can just freehand cut some pieces like I did originally; I folded my paper in half so that both sides of the bow would be symmetrical when I cut. Sort of like you do when cutting out paper hearts, you know?


Anyhow, whether you wing it or use the template, you'll need three parts for each bow: the band in the middle, the loops, and the tails.


Grab the two outer tabs on the "loops" piece, bend them to the center, and glue them down.


Layer the loops piece on top of the tails with a dot of glue, then wrap the band around the center and secure it in the back with a little more glue. All done!

Tuesday, April 16, 2013

DIY neon paper gift bows


Brown paper bags and neon paper can yield some nice-looking gift packaging. I made these bows with more of the Astrobright Neon paper I mentioned yesterday. These look a lot cuter in person because the neon practically glows. The yellow bow is a stack of paper loops glued together. The pink bow is made like this. The orange bow is made from three pieces of paper: the tails, the loops, and a band for the center. (Update: I've added a template for this one right here.)

Thursday, April 4, 2013

DIY posters with cut-out lettering


I'm thinking of making a poster series of ridiculous song lyrics. The first one goes to you, Ke$ha. Next up, Katy Perry. "Baby, you're a firework." What, just one firework? "Boom, boom boom. Even brighter than the moon, moon, moon." A brilliant use of rhyme. Wouldn't a whole wall of these be comical? At least in my mind. And perhaps in the minds of some friends; you know who you are.

But really I just wanted to try cutting out some lettering like I saw in the branding for the Kröller-Müller Museum. Apparently theirs was rendered digitally using Cinema4D software. I went old school and busted out an X-acto knife.


In Illustrator I typed out text using a bold font. (Novecento Wide, bold —free!) Then I outlined the text with a thin stroke and flipped it backwards. This way the printed outlines won't show on the front of the piece. I printed it on cardstock and cut along the outlines, avoiding the highlighted areas above. The left edge of each character isn't cut and acts like a hinge.


I flipped the paper over and bent the letters up, like opening little doors.


I liked it layered on top of a sheet of neon red paper.


And of course orange is always an excellent choice. You could make a series of cut-out posters and group them as wall art. Or make greeting cards with short phrases on them. To make the letters show up, fold a piece of colored paper in half, the same size as your outer white folded card, and insert it inside. Keep it in place inside the white card with a line of glue along the fold.

You could also try cutting shapes out of colored paper and layering white behind it. I opted for cutting into the white, since cast shadows show up best on light colors.

Any suggestions for more silly pop song lyrics?

Tuesday, March 19, 2013

Make an origami bunny for your Easter table

Fold a large origami rabbit for Easter
Wouldn't it be fun to have a litter of origami bunnies for your Easter centerpiece? Do big ones, like this guy I made. Or decorate each place setting with a smaller rabbit. Or hide them around the house just for fun.

This bunny model is designed by Stephen O'Hanlon and demonstrated by Mari Michaelis in this step-by-step video. Mine is made from an 18" square of sketchbook paper. It's much thicker than origami paper, and thus harder to fold, but the resulting rabbit is quite a sturdy fellow. He's about 9" tall.

Then after I folded him, I saw these printable rabbit chocolate bar wrappers at Mini-eco. You could have a thoroughly origami Easter!

Tuesday, March 5, 2013

Easy-to-make St. Patrick's Day decorations

DIY St. Patrick's Day decorations
If you've got paper and tape, you can make some easy St. Patrick's Day decorations. Remember the wall of 3D paper hearts? You can use the same template to whip up some quick shamrocks.

Paper shamrock template and tutorial
To make these:
1. Download this heart template and print it on green paper. Or orange paper, if you want extra points. Nothing wrong with an orange shamrock, is there?

2. Follow the instructions in the original post for forming the hearts.

3. Cut some stem pieces and fold a crease most of the way up the center. These can be long rectangles, slightly curved if you like.


Each shamrock requires three hearts and a stem.


4. Tape three hearts together so their points meet in the center. Tape a stem on top.


5. Apply wall putty or a rolled piece of tape to the center of the shamrock, and stick it to your wall. A surface covered with these would be awesome, and then you could call it an "installation" and get extra respect.

Easy St. Patrick's Day decorations

Thursday, February 28, 2013

Origami arrow magnets and tacks

How to make origami arrow magnets
It only takes a minute to make simple origami arrows. They can be used as magnets to hold up your stuff.

How to make origami arrow magnets
I added self-adhesive magnet tape to these, available from craft stores. You could also chop up some of those free magnets that come in the mail with advertisements on them and glue those on.

How to make origami arrow pins
The arrows can also be turned into thumbtacks for your pin board.

DIY origami arrow pins
Lift up the arrow head flap, poke a tack through the paper, and stick the head back down on top of the tack using glue or double stick tape.

I learned how to make the arrows from Joost Langeveld's site. Refer to the instructions there, or read on to see my steps.

How to fold a paper arrow:
Start with a square piece of paper. Origami paper is easiest to fold because it's thin. If you don't mind a bit of wrestling, you can also use regular printer paper like I did for the red and orange arrows. Those were made from 3" squares. The patterned purple arrows were made from 2.5" squares.

I'll add captions below each photo.


With the pretty side down, fold a square paper in half and open it again. (Or as Maria suggested in the comments, just press a little pinch to mark the center. Then your finished arrow won't have a crease running through the center.)


Fold the top and bottom edges inward to meet the center crease.


Fold the two left corners inward at a 45 degree angle. Edges should align with the center crease.


Fold the pointed end over.


Turn the paper over so the point is hidden, then align it so that the point is positioned like the pink line in the diagram (though the point is on the underside and not visible.) Grab the top edge of the rectangle and fold it down, making a valley fold along the dotted line.


The result should look like this. Half of the pointed triangle is exposed.


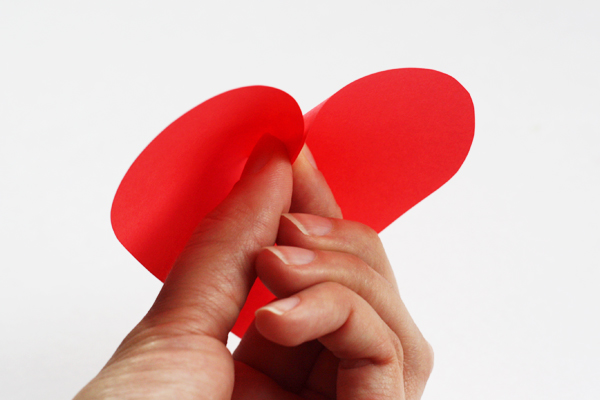
Rotate the paper 90 degrees counterclockwise. (Well, you don't have to, but I found it easier and that's what the photos show!) Press down with your fingernail at the point where the top layer of paper meets the triangle. Poke your other finger in between the two layers of the flap to open up a little pocket, at the same time folding the long top edge of the flap down to meet the center crease.


Squash the resulting triangle flat.


It should look like this.


Repeat on the bottom side, folding the bottom edge upward to meet the center crease.

How to make origami arrows
It should look like this.

Origami arrow instructions
Flip the arrow over and you're done.

If the arrow wants to pop apart a bit (especially if you use thicker paper), add some glue or double stick tape under any flaps to hold them down.

Thursday, January 31, 2013

Make a wall of paper hearts

I like 3D paper things, and multiples of things, and Valentine's Day.

The other night I made these paper hearts while watching TV. You could stick them on a wall or door temporarily, or glue them to a board permanently to make a 3D wall poster. They'd be cool to attach to presents, too. Surprise somebody with an explosion of hearts!

These are made from traditional heart shapes with a slit cut partway down the center. Cut your own hearts freehand, or print and cut out the shapes on the template I made, which might be faster and uses fewer brain cells.

Download the page of hearts here.

To make a flat heart into something three dimensional, roll the inner edges of the two arcs toward the back with your fingers to get the shape started.

Then add a bit of glue or double-stick tape along one edge. Pinch the two edges of the heart together from the back, forcing the center to naturally pop up.

When the edges are glued together, the heart looks 3D.

I used bits of double-stick tape to secure mine—a speedy method—but a few of the hearts popped apart within a couple days and had to be re-stuck. Glue holds better, I found.

Once you get the hang of it, you can bend that paper to your will and make dozens.

Then stick a flock of hearts to a wall with loops of tape or poster putty placed at the bottom point on the back side of each shape.

Get Discount Here