Thursday, February 28, 2013

Origami arrow magnets and tacks

How to make origami arrow magnets
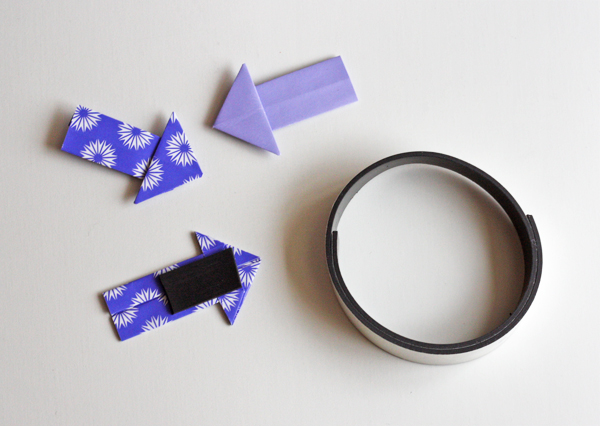
It only takes a minute to make simple origami arrows. They can be used as magnets to hold up your stuff.
How to make origami arrow magnets
I added self-adhesive magnet tape to these, available from craft stores. You could also chop up some of those free magnets that come in the mail with advertisements on them and glue those on.

How to make origami arrow pins
The arrows can also be turned into thumbtacks for your pin board.

DIY origami arrow pins
Lift up the arrow head flap, poke a tack through the paper, and stick the head back down on top of the tack using glue or double stick tape.

I learned how to make the arrows from Joost Langeveld's site. Refer to the instructions there, or read on to see my steps.

How to fold a paper arrow:
Start with a square piece of paper. Origami paper is easiest to fold because it's thin. If you don't mind a bit of wrestling, you can also use regular printer paper like I did for the red and orange arrows. Those were made from 3" squares. The patterned purple arrows were made from 2.5" squares.

I'll add captions below each photo.


With the pretty side down, fold a square paper in half and open it again. (Or as Maria suggested in the comments, just press a little pinch to mark the center. Then your finished arrow won't have a crease running through the center.)


Fold the top and bottom edges inward to meet the center crease.


Fold the two left corners inward at a 45 degree angle. Edges should align with the center crease.


Fold the pointed end over.


Turn the paper over so the point is hidden, then align it so that the point is positioned like the pink line in the diagram (though the point is on the underside and not visible.) Grab the top edge of the rectangle and fold it down, making a valley fold along the dotted line.


The result should look like this. Half of the pointed triangle is exposed.


Rotate the paper 90 degrees counterclockwise. (Well, you don't have to, but I found it easier and that's what the photos show!) Press down with your fingernail at the point where the top layer of paper meets the triangle. Poke your other finger in between the two layers of the flap to open up a little pocket, at the same time folding the long top edge of the flap down to meet the center crease.


Squash the resulting triangle flat.


It should look like this.


Repeat on the bottom side, folding the bottom edge upward to meet the center crease.

How to make origami arrows
It should look like this.

Origami arrow instructions
Flip the arrow over and you're done.

If the arrow wants to pop apart a bit (especially if you use thicker paper), add some glue or double stick tape under any flaps to hold them down.

Wednesday, February 27, 2013

Free, vintage Facebook cover images


If you're tired of your Facebook timeline banner, you're welcome to download one of these free cover images. I made them using bits and pieces of public domain art from vintageprintable.com. Their licensing states that the site's images can be copied, shared, distributed, and adapted— even commercially— so here you go.

Click any image to bring up the larger size. Then save it to your computer and upload it to Facebook.


Tuesday, February 26, 2013

A good gallery of free fonts

Free modern fonts
If you like adding free fonts to your collection, you might take a stroll through FreeTypography.com. It's a round-up of some of the best free fonts contributed by designers around the globe.

Friday, February 22, 2013

Oscar bingo on TV


My annual Oscar bingo game made an appearance on the ABC talk show LIVE with Kelly & Michael this morning. Thanks for the mention, Carly, Kelly, and Michael!

For an animated look at what Kelly was actually thinking, click here. To see Michael's secret thoughts, click here.

And for more Oscar party ideas and general inspiration, check these out:

An Oscar fashion quiz: Who wore the dress?

An Oscar trivia quiz: An impossibly hard test that will stir up feelings of inadequacy

Cocktail recipes for your 2013 Oscar party: A round-up of nominee-inspired drinks from fancy LA restaurants

Oscar party potluck recipes: A nod to each of the films up for Best Picture

A recipe for Crabby Snacks: You know, from Silver Linings Playbook. Someone attempted to figure out what crabby snacks and homemades are. I love the internet.

Have a great weekend!

Thursday, February 21, 2013

Tattoo a banana for breakfast


Designer and illustrator Honey emailed to suggest that serving tattooed bananas might be a good idea for a brunch party. Might be? Heck yes; I love this kind of craziness. Put them in lunch bags! Hide them in the produce section at the grocery store and giggle at perplexed shoppers!

I had to try it immediately.


Simply make lots of tiny punctures in the banana peel with a pin, and the holes will turn brown. (I drew a quick outline on the banana with a sharp pencil first, then filled it in.) The banana will start to turn brown immediately. The longer you wait, the darker the black becomes, and it starts to look a bit debossed.

The heart is the result of 60 seconds of poking, then waiting overnight. The "hi" photo was taken half an hour after puncturing.

But I'm just an amateur banana tattoo artist. Look at Honey's Blues Brothers version:


See more of her work here. Wowzers. Except for the lettered versions, those are freehanded. You could also poke holes through a template printed on paper.

Have fun, kids. You know you wanna do it.

Wednesday, February 20, 2013

Make hexagon-shaped pillows


Have you seen Diane Gilleland's kaleidoscope pillow tutorial over at Spoonflower? Each pillow is sewn from two fat quarters of fabric. They're nifty.

Tuesday, February 19, 2013

Printable letters for party banners


HP has a big library of printable files, including these letters and numbers you can print and string to make banners. Nothing says "I love you" like using up an entire ink cartridge on someone you care about.

(Or use the smart tip Krysalia left in the comments on this post: get the letters printed by a photo service. Twenty 4x6 prints might only cost you $2-$3.)

Get Discount Here